Showing posts with label diy. Show all posts

Monday, February 09, 2015

Winter projects continues

Hey y'all!

Remember this post from way back when? Well, it's time for a change, and to say bye bye to the monkeys. 


Apparently we love this gray by Sherwin Williams.  So far we have painted the hallway going into this bathroom and also the bathroom, and our office.  We are also painting Mason's room gray.


We decided to put the shelves back in the same spot after painting.  

 Now it's time to decorate.  Mason has decided he would like a seashell bathroom.  I agree. We love the the beach and what better way to bring it into our home. 

I found this artwork on houzz.com and of course my first thought is...  I can totally make those and they will look super cute in this bathroom.


I'm loving this crab!


 We have wood leftover from our deck project, so I am totally on board with another diy!  I mean how hard could it be, right?


I have a vision of white and navy with some accents of orange (per Mason's request).  Having a plan in mind seems to help me pick out items when I'm shopping.  Sometimes having a vision can go way wrong or I get disappointed afterwards if it doesn't turn out they way I had planned. 

I would like to have a display of seashells on these shelves.  Maybe a picture or two and I feel like I need something with some height.  
 

Obviously our monkey shower curtain must go.  I'm thinking a white shower curtain with maybe a stripe or two of navy. 
 

An oar would look really cool here, don't ya think?


HomeGoods here I come!

Thursday, July 31, 2014

Make room for hot tub


Hey y'all!  

We had absolutely no plans to purchase a hot tub, but sometimes you just can't pass up a good deal.  Well, "the deal" literally fell in our laps back in January.  We get the hot tub in the middle of winter which would have been great; however, it sat in our garage for about 3 months before we could move it out due to all of the snow we had this year.  

We thought about several different options on what to put under the hot tub. Concrete, pavers, etc. 

And so the construction begins...


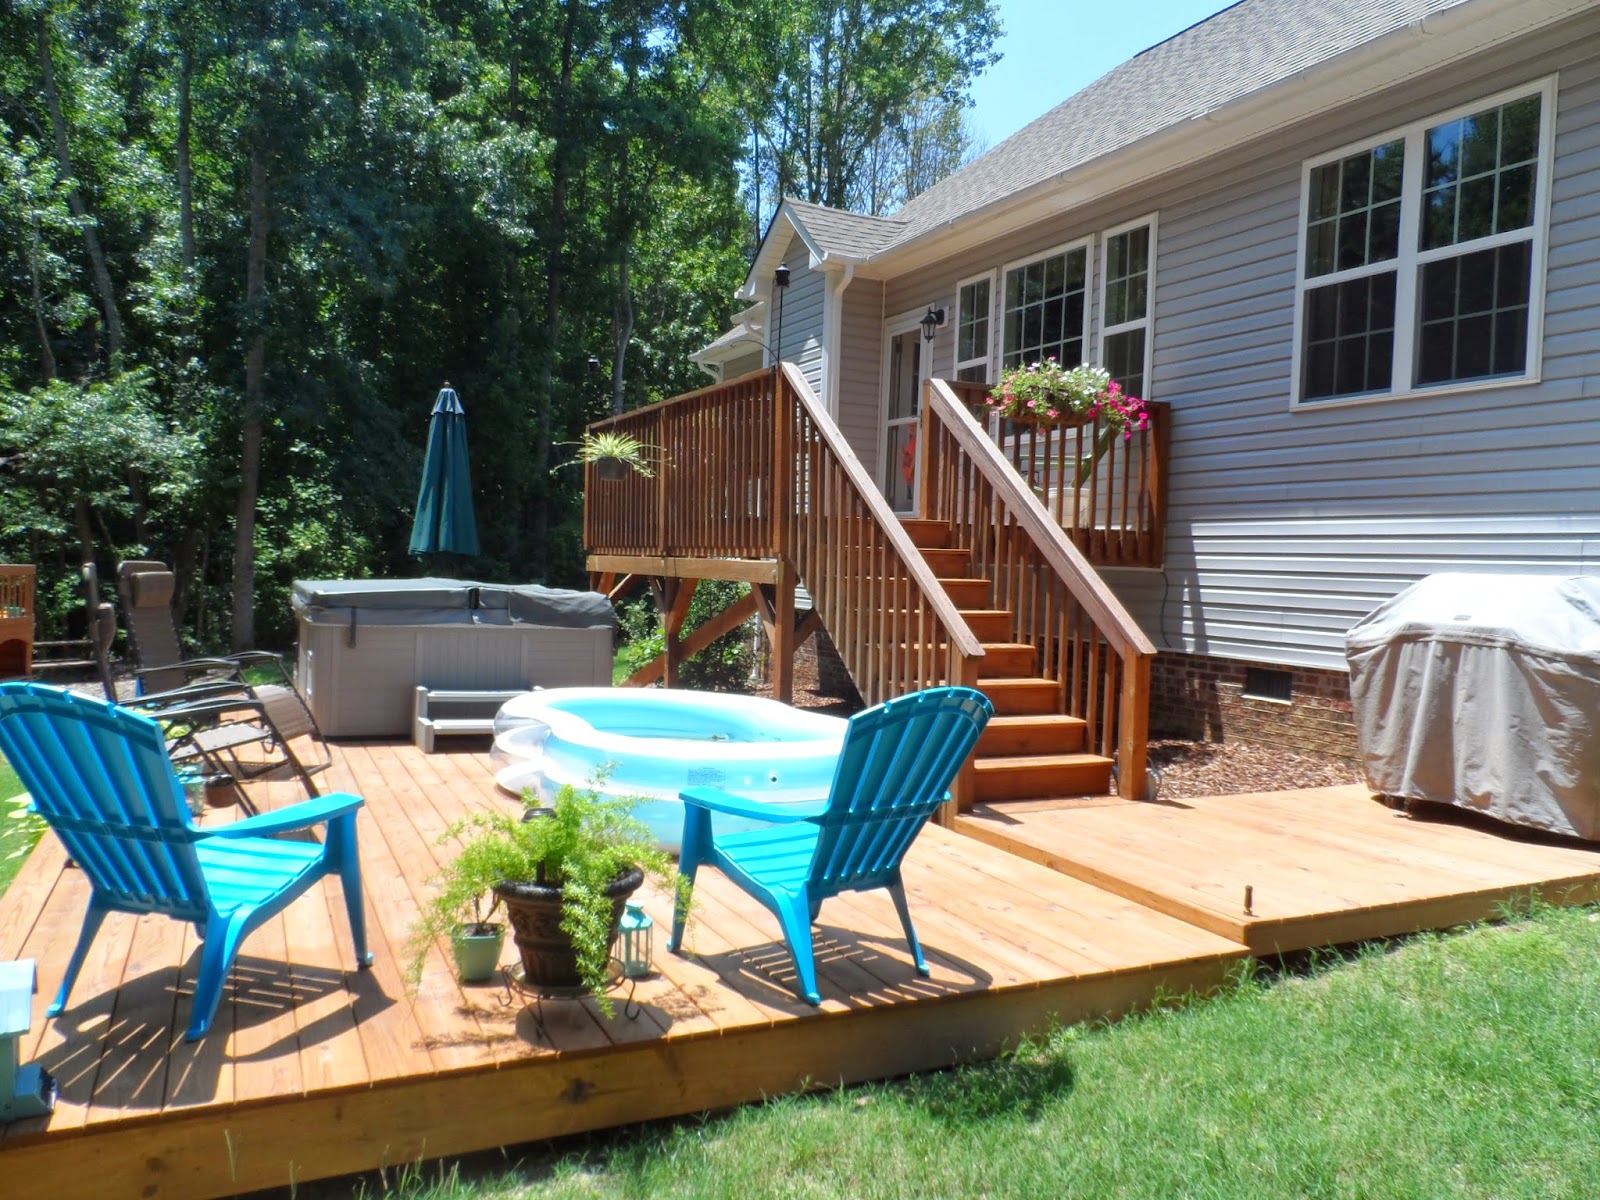
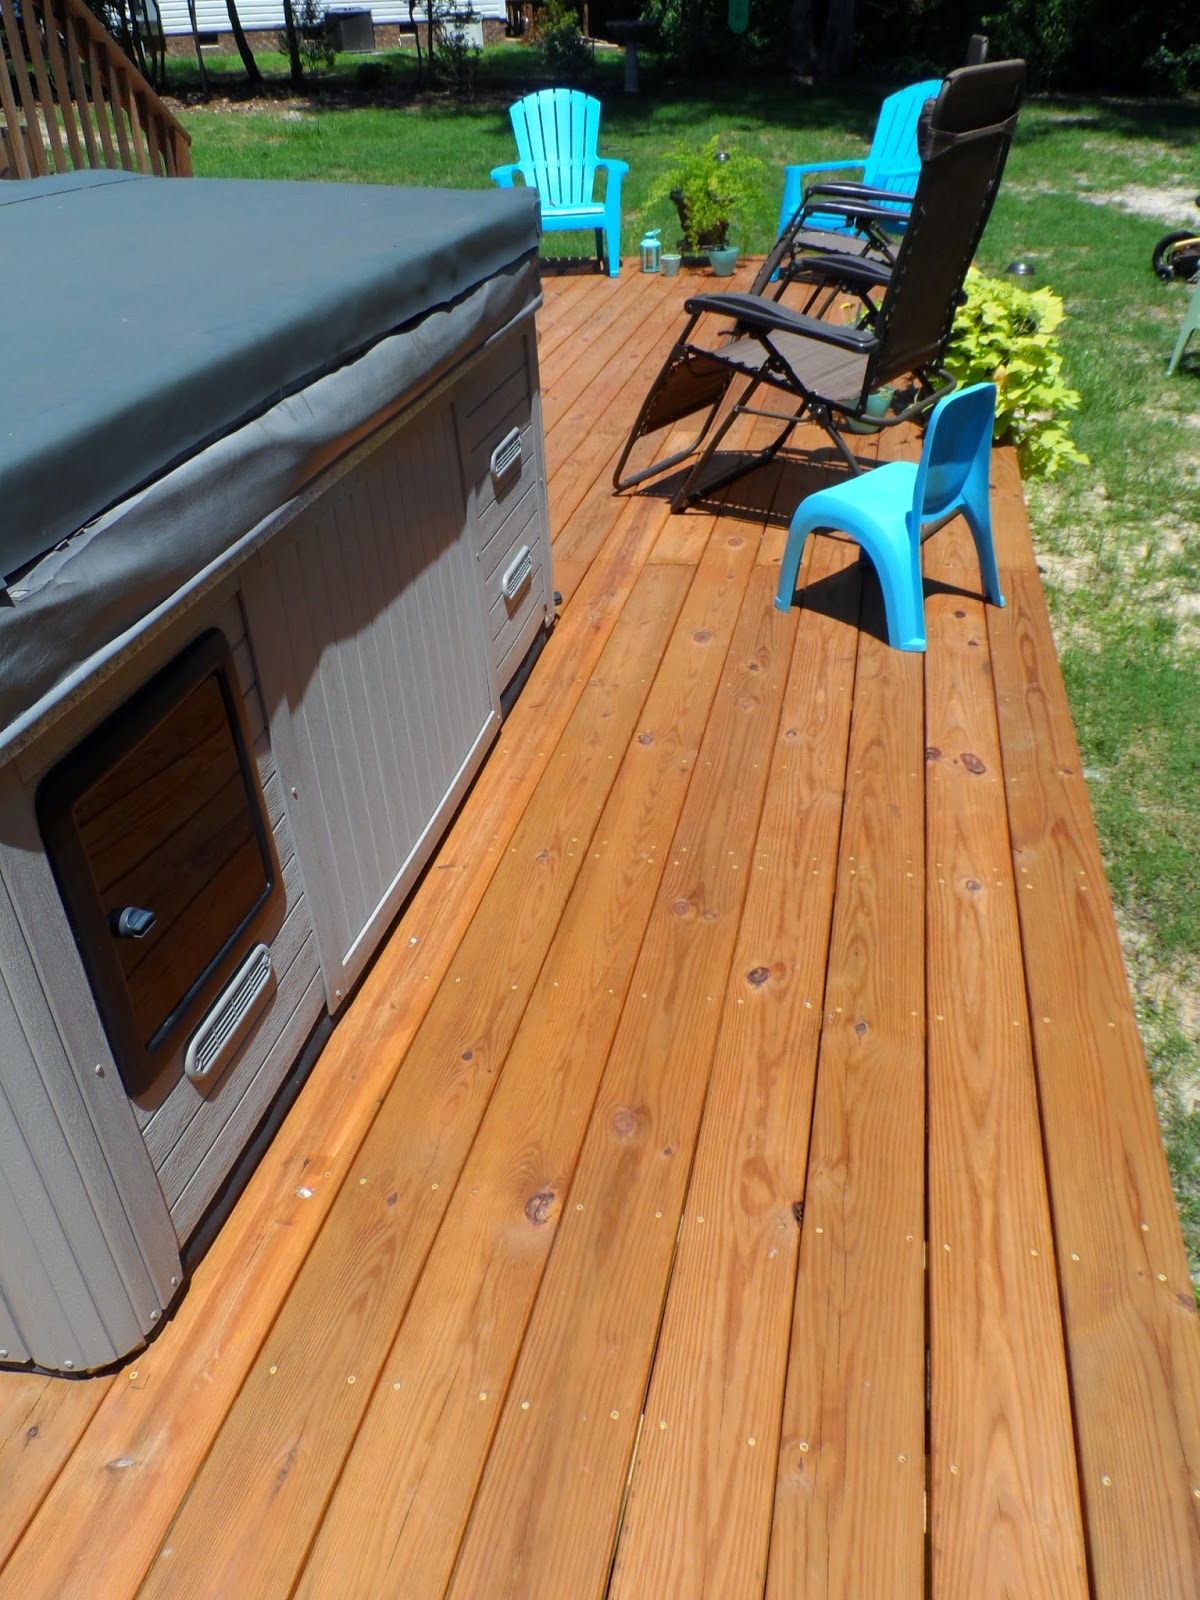
We decided to add on to our current deck and have a lower deck area for the hot tub, grill, and extra sitting area.  Before we started the frame, we placed cinder blocks under where the hot tub will sit for extra support.

After lots of sweat, some blood, and a few tears, we are done! Well, for now. 


We love how it turned out! 


Perfect spot for the grill.


Plenty of room to walk around the hot tub.


Now we have a ton of space on our original deck which will be nice when entertaining.  


I'm not sure who is enjoying the hot tub more.  Us or monkey! 

Tuesday, March 05, 2013

Burlap Spring Wreath

 Hey y'all! I made a wreath.  

Well, I decorated a grapevine wreath. 

I love grapevine wreaths and this is actually the first time I've decorated one.  I generally just buy a wreath off the shelf, but I really didn't see one that I loved and the ones I saw were $40 +.  You know me.  I said, I can make one for cheaper and change it up with the season/holiday.

I'm going to show you exactly what I did and the materials I used.

First, this cute little 'K' I got from JoAnn Fabrics.  


Tacky glue I had already, but you can get this stuff pretty much anywhere.  I really like this glue because it is all purpose and dries clear.  Works great on fabrics too!


These cute little eggs are from Target.  I really didn't go looking for eggs, but I always check out the dollar area in Target and they there were.  I bought two packs $1 each and there are 8 eggs in each package.


I also got this burlap fabric from JoAnn's.  Again, I wasn't looking for fabric, but I always look through the fabric remnants.  This little bundle was there for $1.99.  It was not quite one yard and I thought.... surely, I can use this for something. 

Again, I'm really just picking up pieces here and there that I like and hope they come together in the end. 

I knew I wanted rosettes on my wreath.  So, the first step was making the rosettes.  


I rolled out my burlap remnant and folded it to make creases in the fabric.  Basically, this just gave me a guideline of where to cut the strips of fabric.  Burlap creases easily, so there was no measuring or drawing lines.  

Easy. Right?


I didn't measure, but I would say my strips of burlap were 16" long by 3" or 4" wide. It really doesn't matter.  Just keep in mind the longer and wider, the bigger your rosette will be.


Once I cut my strip of fabric, I folded it over twice to make cleaner edges and a fatter rosette.


Once the fabric was folded over, I tied a knot at one end.  The knot will keep the fabric together and make it easier to roll the fabric into your rosette shape.


Once the knot is tied, you can begin rolling.  Think of a cinnamon roll.  I just rolled and tucked until I had the shape I wanted. Once I got to the end of the fabric, I tucked in the last part to make a smooth edge.

The most important part of the rosette is gluing a piece of fabric to the back.  This will hold the shape of your rosette together.  Especially when using burlap.  It's a very rough and strong fabric, so this step will make a big difference.


I cut a square piece of fabric  (the size of the rosette) and glued it to the bottom.  Either side of your rosette can be the bottom.  Just choose the prettier side for your top. 


So, my square piece of fabric is now glued to the bottom. 


Now, just use scissors to cut the fabric to fit your rosette. 


There you go!  I actually made 3, but only have 2 in the picture.  By the way, your rosettes will be different.  You are making them by hand and rolling them, but it's ok.  That's the glory of handmade!  They don't have to be perfect.


Ok.  So now we have our rosettes....

Thank goodness because I think I just said that word (rosettes) like 100 times!  HA!


Alright, on to the next step!  

A snack!  Yep!  You must have a snack when you are working this hard.

I thought jelly beans was appropriate!  

Aren't they pretty?!  


The fun part.  Gluing everything to the wreath.


This is your creation. Use the colors you like!  Glue your rosettes (here we go with that word again) to your wreath. 

I only used three and I wanted them closer to the bottom/side.

Honestly, I laid all of my decorations on the wreath before I glued any of them. 

I did use a hot glue gun to glue my rosettes and eggs.

The letter K was tied to a string.  I used burlap garland to hang the wreath and letter and then just tied the bow.


I also added a butterfly I found at Carolina Pottery.  I found the butterfly in the floral department and it was on a wire stem.  I just cut the stem down to size and stuck it in the wreath.  I didn't bother gluing it.  I just bent the stem around a vine to hold it in the wreath.

There you have it.  My burlap Spring/Easter wreath.


Let's breakdown the cost:

Grapevine Wreath: $4.99
Burlap Remnant and Garland: $6.00
Eggs: $1.00
Butterfly: $3.00
Letter K: $3.00

Total {diy} Cost= $18.00 plus tax

Not bad, huh?

I did use a 40% coupon for the burlap garland.  It was originally $9.00.


Just noticed my door needs to be cleaned!  OOPS!

Saturday, February 09, 2013

Show Us Your Life ~ DIY Projects


Hey y'all!  Today we are talking about our DIY projects and linking up with Kelly's Korner.  I'm so excited.  This is one of my all time favorite topics.

I am definitely one of those people who say (when shopping and looking at magazines), I can make that myself.  Most of the time, it means, my husband can make it for us.  And, he normally will!  Yes, I'm a lucky girl! 

I just can't see paying $200 for something that I can make for $50 or less in some cases.  I'm not cheap.  Maybe I'm just frugal or is that the same thing? Either way, we get what we wanted, it looks great, and most of the time will be made to last! 

A great example was just a few months ago.  My husband asked me what I would like for my birthday.  I wanted some ledges/shelves I saw on the Pottery Barn website.  Well, of course they were very expensive, but it was the only ones I found that I really liked.


And these are the ones my husband made.  He did a great job!  I love them! And guess what?  They only cost us $35.  


My diy chalkboard here.


Diy Cornice Board here.


I have to say, I love Pinterest and I have lots of ideas just waiting for me.  

My Pinterest DIY& Crafts board here.

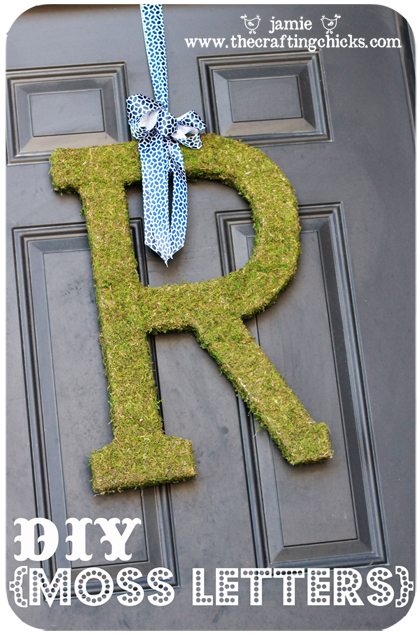
One of my favorite projects that I haven't done yet is the moss letters.  Really the only reason I haven't yet is because I couldn't find a 'K' in the size I want.

You can find the Moss Letters tutorial here.

This is a great craft for Spring. 


http://thecraftingchicks.com/wp-content/uploads/2012/04/moss-letter-1.jpg

I'm looking forward to seeing your DIY projects.  Thanks for visiting!

Tuesday, March 20, 2012

Tuesday's Tip

~Organizing~

I am always looking for new ways to organize. Since we have downsized, and since I'm at home now, I look around, and think, there has got to be a better way to make use of our space.

I LOVE these shoe organizers. To me, they should be called All Purpose Organizer. The ones I am using are just basic canvas with over the door hangers. I'm using the ones that have a clear pocket. Obviously, you want to see what you are storing. This will also help let me know when we are running low on something. I ordered these organizers from Target for only $12 per organizer.


We do have a pantry, but it's not the ideal size for me personally. In my dream home, I would love to have a HUGE (walk-in size) pantry, but for now I'm working with what we have. To make room for our stock pile :), I'm using the organizer for smaller things. Oatmeal packs, drink mixes, breakfast bars...etc. I put Mason's snacks in the lower pockets. He just walks right in and grabs his afternoon snack. HA!


I have also put an organizer in the closet in Mason's playroom. Flash cards, glue, cd's, craft paint, crayons...etc. I'm still working on this one, but I think it's a good start.

There's a place for everything, and everything in it's place, Right?! It helps me keep my sanity. ;)

Tuesday, February 14, 2012

Tuesday's Tip


~Wire Shelves~

UGH! These shelves can be such a pain, especially when they are in your pantry. Cereal boxes tip over, cans sit uneven, things don't slide easily....etc.

I would love nothing more than to have my closets and pantry with the wooden shelves, but unfortunately, our house didn't come with those! :( Neither did our first house, but we found a solution.

Self-adhesive vinyl floor tiles. No particular brand, just whatever is the cheapest. I, personally, like the self-adhesive, but they don't have to stick. This box was only $12 at Family Dollar and we were able to do our entire pantry, and 2 shelves in our laundry room. So easy. Just peel and stick. You may have to do a little measuring or cutting, but it's worth it.


The end result. Everything sits evenly on the shelf. No tipping over and so much more easy to organize.


And, by the way, HAPPY VALENTINE'S DAY!